Unity Custom Project Templates (or: How to get rid of the example assets when creating a new HDRP/URP project)
Learn how to create a custom Unity project template to get rid of the example assets when creating a new HDRP or URP project.


I love working the the HDRP and URP pipelines. And, thanks to our little Indie Game Studio Boundfox Studios, I started doing some fancy YouTube videos about Unity. I find myself alot creating new Unity projects, either to test stuff out or for a new video creation. Everytime, I have to delete all the example assets. But there's a way to fix this. And here is how to do that!
Unfortunately, due to the nature of how Unity installs their editors, you have to repeat the following tip for every version you have installed and want to have a custom project template. Also, keep that in mind if you install new Unity versions.
Locate the project templates
At first, navigate to your Unity installation folder and locate the project templates:
On macOS: /Applications/Unity/Hub/Editor/<VERSION>/Unity.app/Contents/Resources/PackageManager/ProjectTemplates
On Windows: C:\Program Files\Unity\Hub\Editor\<VERSION>\Editor\Resources\PackageManager\ProjectTemplates
Replace <VERSION> with your Unity version you're using most of the time.
On macOs, you'll see some *.tgz archive files. On Windows, there'll be normal folders.
In my case, I want to create a new template based on the URP template, so I unzip the com.unity.template.universal-8.2.0.tgz file. On Windows, create a copy of that folder.
Name the folder so you know, what whill be in there. I named mine com.unity.template.universal-8.2.0.empty.
Adapt the template
Open the folder and locate the package.json file. In there, you should at least change two things: The name and displayName property, e.g.:
{
  "name": "com.unity.template.universal.empty",
  "displayName": "Empty URP",
  // everyhing else
}
Next, open the ProjectData~ folder, that's the holy grail. :-)
You can adapt anything you want. I my case, I deleted everything in the Assets folder excpect the Presets and Settings folder. In the Settings folder, I removed everything except the ForwardRenderer and UniversalRP-HighQuality.
Take care, that you remove all the *.meta files for the stuff, you have deleted. And don't delete the *.meta files for stuff that is still in there.
Because I've deleted the Scene file, we need to change two things as well. Locate the folder ProjectSettings in the ProjectData~ folder. Then open the file EditorBuildSettings.asset. In there, remove the reference to the SampleScene. The file will look like that:
%YAML 1.1
%TAG !u! tag:unity3d.com,2011:
--- !u!1045 &1
EditorBuildSettings:
  m_ObjectHideFlags: 0
  serializedVersion: 2
  m_Scenes:
  m_configObjects: {}
Then, open the file ProjectSettings.asset. Find the line that beings with templateDefaultScene and remove the whole line.
If you want, you can also change other properties, e.g., the company name, other default packages to install and so.
Save everything and it's done! On macOS you don't need to archive the folder again, it works with a normal folder as well.
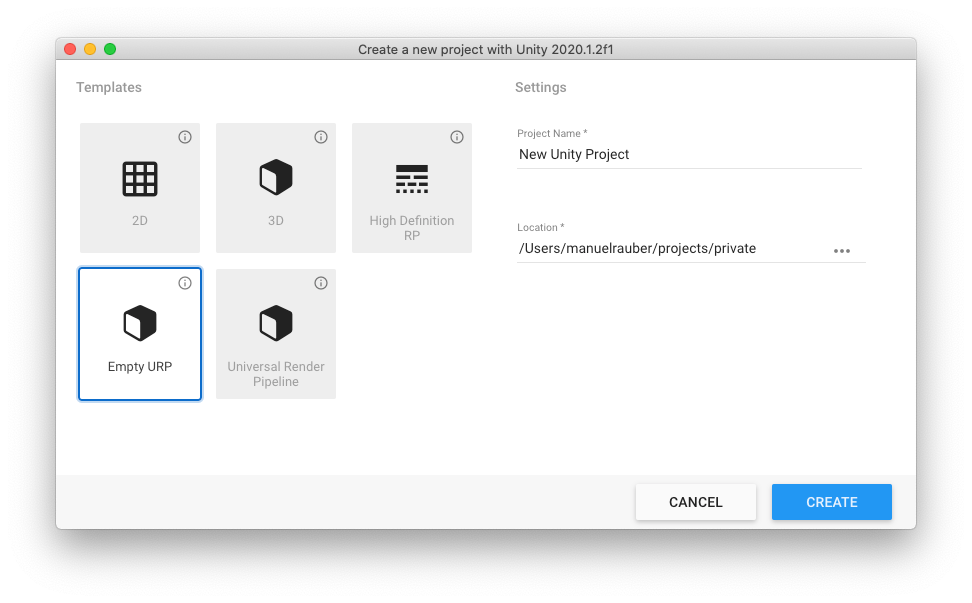
If you know go to Unity Hub and select New, you will see the created template.