"Alexa: Start Lego Robot" - Connecting Amazon Alexa to Lego Mindstorms EV3

Ever thought of controlling your Lego Mindstorms robot via voice? Even EV3 does not have enough performance to cover that scenario. But with a combination of the latest and greatest voice services, like Amazon Alexa, Google Home or even Cortana, it's possible to control a Lego Mindstorms robot via voice. How to? Read on!
Intro
Within this blog post we're going to speak about the following agenda:
All code is also available at GitHub, so you can go on and put it onto your own devices. There is also a video available in German, but you'll get the point. The sample has been built by my friend Christian Weyer and me.
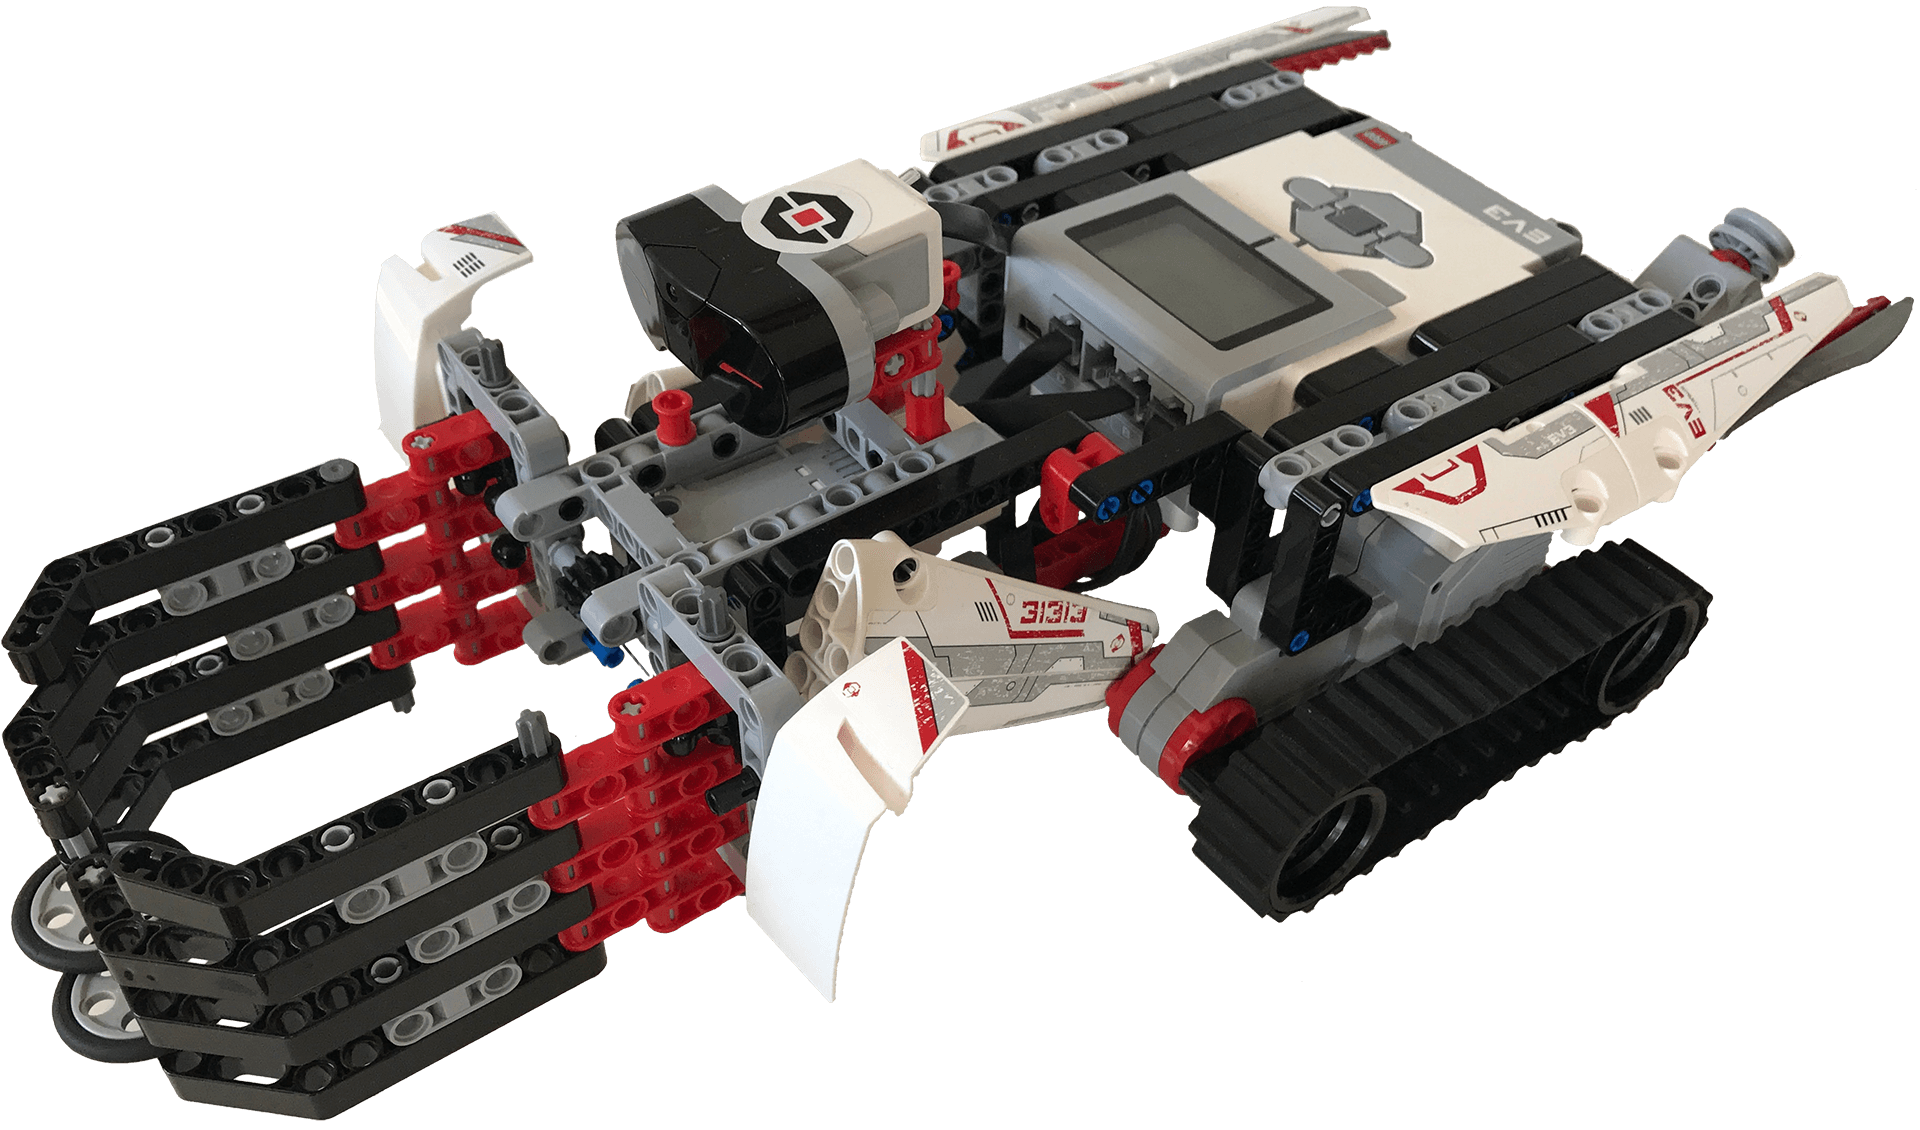
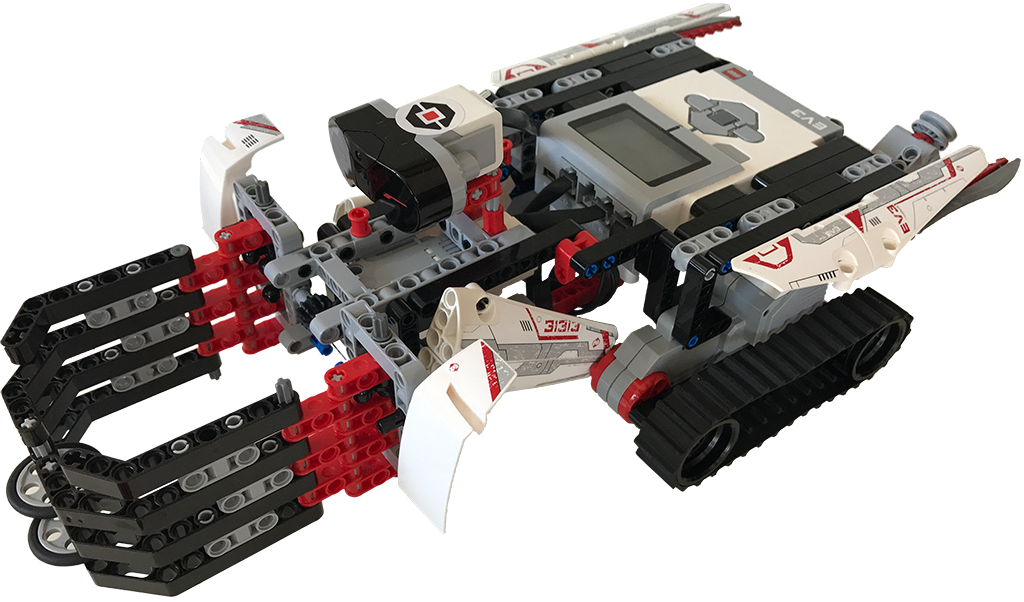
The robot was built by Christian's son and continuously updated to grab a cup of fresh tapped beer. :-) It has the following features:
- Claw: Can be opened and closed to grab the finest refreshments.
- Infrared Sensor: To recognise a cup in front of the robot, to know when it should open and close its claw.
- Two motors: Well, obviously for driving.
General Architecture Idea
If you develop a Skill for Amazon Alexa or an Action for Google Home (referring to Skill for both from now on), you'll normally start with putting a lot of your business logic directly into your Skill. For testing or very simple Skills this is ok'ish, but there's generally one problem: The code will be directly integrated into your skill. So, if you want to extract your code later (e.g. moving it to an Google Home Action), you'll have a hard time trying to extract to code into a library.
Speaking of a library: That's something you always should do. Encapsulate your code into a little library and provide an API which is used by the Skill to execute the function. By that, you can reuse your library wherever you want.
I guess, that most of the time, you'll already have your business logic somewhere hosted and you want to have an VUI (Voice User Interface) for that. Basically, all Voice devices are just Voice to HTTP translators. You speak some words and transform them into API calls to execute the business logic and read the results to the user. By that, you don't need to care, if you want to support Amazon Alexa, Google Home, Cortana or whatever API there is which translates voice into words. You'll simple build a Skill of every platform you want to support and call your own API for the business logic.
Of course, this needs more implementation time, but it's easier for testing, since you can test your business logic by simply calling your API via Postman. And if this works, the VUI is a piece of cake.
For the sample on GitHub we used that architecture as well, which looks like this:

API Bridge
The API Bridge is the central communication point for the Alexa Skill and the EV3 Robot. In our sample, this API is built in Node.js and hosted on Azure. For the Skill and testing purposes an HTTP(S) API (done via restify) is exposed, understanding the following API calls:
claw/open: Opens the claw.claw/close: Closes the claw.move/forward: Indefinitely moves forward, until amove/stopcommand is issued.move/backward: Indefinitely moves backward, until amove/stopcommand is issued.move/stop: Stops the robot.doitdude: Runs a predefined program to grab some beer in front of the robot.
Additionally, a WebSocket server via Socket.io v1) (important, v1, not v2!) is exposed for the EV3 Robot. Basically, the API Bridge translates HTTP(S) API calls into WebSocket commands which will be executed by the EV3 Robot. The WebSocket commands are the same as the HTTP(S) API endpoints, where the first part of the command is used as the message type and the second part as the payload. The following sample shows the controller for the claw:
const socketServer = require('../../socketServer');

class ClawController {
    init(restify) {
        restify.get('/claw/open', this._open.bind(this));
        restify.get('/claw/close', this._close.bind(this));
    }

    _open(req, res) {
        socketServer.send('claw', 'open');
        res.send(200);
    }

    _close(req, res) {
        socketServer.send('claw', 'close');
        res.send(200);
    }
}
The API Bridge is also auto deployed to Azure whenever a commit to the master branch is pushed, making iteration cycles and testing incredibly fast.
Alexa Skill
According to a typical Alexa Skill, we're using an AWS Lambda Function running Node.js 6.10. The following intents (currently only in German) are available:
ClawIntent: Can open and close the claw.- Voice Command:
Zange {ClawOperation}with the followingClawOperations:schließen: Closes the claw.öffnen: Opens the claw.
- Voice Command:
MoveIntent: Can move the robot.- Voice Command:
Fahre {MoveOperation}with the followingMoveOperations:vorwärts: Moves the robot forwards.rückwärts: Moves the robot backwards.
- Voice Command:
StopIntent: Stops any movement.- Voice Command:
halt.
- Voice Command:
DoItDudeIntent: Runs the predefined program.- Voice Command:
hop.
- Voice Command:
The handler for the ClawIntent looks like this:
const clawOperationValueMap = {
    'schließen': 'close',
    'öffnen': 'open'
};

const handlers = {
    'ClawIntent': function () {
        const clawOperation = this.event.request.intent.slots.ClawOperation;

        if (!clawOperation.value) {
            return this.emit(':ask', this.t('CLAW_NOT_POSSIBLE'));
        }

        const value = clawOperation.value;

        if (!clawOperationValueMap[value]) {
            return this.emit(':ask', this.t('CLAW_VALUE_NOT_POSSIBLE'));
        }

        executeApi('claw/' + clawOperationValueMap[value],
            () => this.emit(':ask', this.t(value === 'open' ? 'CLAW_OPEN' : 'OK')),
            () => this.emit(':tell', this.t('ERROR_INVOKING_API')));
    },

    // ... more intents ...
}
Whenever the ClawIntent is recognised by Amazon Speech Services (which are used by Alexa) the handler is executed. It has a slot called ClawOperation. A slot is a placeholder within a sentence which can has multiple values depending on the user's desire. In this case, the values of ClawOperation are
schließenfor closing the claw andöffnenfor opening the claw.
The first step in the intent is to check, if we got a slot value. For example, instead of saying Zange öffnen the user could just say Zange. After a certain timeout, the intent will be triggered but without having a value for the ClawOperation slot. In this case, we ask the user again what he want's to do.
If we got a value, we try to map the value to something, the API Bridge will understand. Basically, it tries to map the German word schließen to close and öffnen to open. If this is not possible, we respond that to the user who has to start over.
If we got the value, we've everything we need to call the API by using the executeApi() function:
function executeApi(api, success, error) {
    request.get(baseUrl + api, function (error, response) {
        if (response.statusCode !== 200) {
            return error();
        }

        success();
    });
}
The executeApi() function is a simple wrapper for request, a Node.js module, accepting an api-url, success- and error-callback.
Within the skill we can use this.emit() to read out some text to the user, which is translated by this.t() and an identifier for the text:
const languageStrings = {
    de: {
        translation: {
            CLAW_NOT_POSSIBLE: 'Leider habe ich nicht verstanden, was ich mit der Zange machen soll. Was möchtest Du machen?',
            CLAW_OPEN: '<say-as interpret-as="interjection">sesam öffne dich</say-as>',
            CLAW_VALUE_NOT_POSSIBLE: 'Die Zange kann nur geöffnet oder geschlossen werden. Was möchtest Du machen?',
            DO_IT_DUDE: '<prosody volume="x-loud"><say-as interpret-as="interjection">donnerwetter.</say-as></prosody> Ab geht die wilde Fahrt. <say-as interpret-as="interjection">juhu.</say-as>',
            // ... more texts ...
        }
    }
};
In all successful cases we emit :ask which makes Alexa listen to user voice. By that it's possible to issue several voice commands without having to start the Skill for each command. But, if an error happens, we're using :tell, so Alexa speaks to the user and stops the Skill.
The good part here is, as mentioned in the General Architecture Idea part is, that the Skill is only a Voice to HTTP translator, making it easily portable to other systems.
EV3 Robot
The last part to make it work is the software for EV3 itself. The first thing we did was to install ev3dev, a Debian Linux-based operating system which is compatible to EV3. At first, we wanted to use Node.js on the robot as well, so we can easily use Socket.io for the WebSocket connection to Azure. Unfortunately, only Node.js 0.10.x is available, since it includes the Chromium runtime supporting ARM9. Later versions of Chromium (and therefore Node.js) dropped support for ARM9. Unfortunately, Socket.io did not work with Node.js 0.10.x (at least not in current v1-stable version).
With a broken heart we decided to use Python3 which is also available and supported by ev3dev. Additionally, we needed to install Python Package Index (pip), because we needed to download a dependency: socketIO-client, a Python implementation to connect to a Socket.io server, but only a v1, not a v2 server.
Having installed everything, we could connect to the server via the following script:
from socketIO_client import SocketIO

def onClawCommand(command):
    print('CLAW Command: ' + command)

    if (command == 'open'):
        openClaw()
    else:
        closeClaw()

def openClaw():
    clawMotor.run_timed(time_sp=200, speed_sp=500)

def closeClaw():
    clawMotor.run_timed(time_sp=250, speed_sp=-800)

socket = SocketIO('http://url-to-socket-server.io')
socket.on('claw', onClawCommand)
socket.wait()
First step is to import the client and create a connection. After that, we can simply use the on()-method to connect to a message type and execute the command, when the message was sent to the robot. By that, we wired up all commands.
socket.wait() is used to keep the software alive on the robot. Otherwise it would be closed, making it unresponsive to other commands.
If everything is up & running, speak to Alexa and the robot's going to move. Don't forget to check out the GitHub repository and the video. :-)