Barrel shooting animation

In this little blog post I want to cover how a barrel shooting animation is created. When the player shoots (in this case presses the left mouse button) a little shooting animation should be started. It will animate a recoil of the barrel.This is how the tank game object currently looks like:
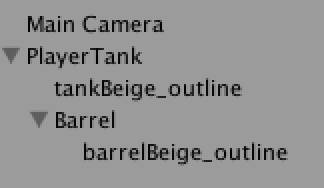
The PlayerTank is just a GameObject with the PlayerTank script attached to it, we created in the last blog post. tankBeige_outline represents the body. Barrel is a empty GameObject. Last but not least: `barrelBeige_outline* represents the visual of the barrel.
What do we need to do now? We need an animator and an animation which will be used for the barrel. And we need a new script which will play the barrel animation when the player presses the left mouse button. Let’s start by creating the animation!
Animate all the things!
To start with the animations, we need to add an Animator-Component to the Barrel GameObject. The newly created Animator wants to have an animation controller. To create one, right click within Unity’s project view and select Create -> Animation Controller. Then assign the Animation Controller to the Animator of the Barrel GameObject. Now open the Animation Controller and add two states by right click -> Create State -> Empty. The state which is directly connected with the Entry state should be named Idle. This state does not do anything (yet). The second created state should be named CannonFireAnimation.
Next step is to create a trigger, which is used for the transition from Idle to CannonFireAnimation. To do that, switch to the parameter view of the animator, click the little plus button and select *Trigger. *Name it FireTrigger.
Right click the Idle state and select Make transition. Left click CannonFireAnimation to create a transition. Select the newly created transition to change the following values:
- Uncheck Has Exit time: We don’t need an exit time for the animation.
- Set Transition Duration to 0.25.
- Set Transition Offset to 0.
- Add a
Conditionand set its value to FireTrigger.
Now create another transition from CannonFireAnimation to Idle with Has Exit time enabled and set its value to 0.01.
If not open yet, open the Animation window. You can find it in Unity’s menu Window -> Animation. At first select* Barrel* from the PlayerTank GameObject. Within the Animation window select the CannonFireAnimation from the top left drop down menu. Click on Add property, expand barrelBeige_outline and click the little plus icon next to Position.
Move the last key frames, which are set at one second to the 0:20 seconds mark. At 0:10 seconds create new key frames (right click the key frame window -> Add key). Then select the key frame at 0:10 seconds and the Position.y property. A single key frame should be selected now. Set the value of the Position.y value to -0.09.
That’s it! You can now press the little play button of the animation window to see a preview The barrel should move according to the values set.
Push the button!
Next step is to create a new script (I called it PlayerShoot.cs) which is attached to Barrel GameObject. The script has the following content:
using UnityEngine;
using System.Collections;

public class PlayerShoot : MonoBehaviour {
	/// <summary>
	/// The animator used to controll the animations
	/// </summary>
	private Animator _animator;

	/// <summary>
	/// The time when fire can be triggered again
	/// </summary>
	private float _nextFireTime;

	/// <summary>
	/// The amount of time to wait before another fire can be triggered
	/// </summary>
	public float ReloadTime = 0.4f;

	public void Awake()
	{
		// Get the animator component
		_animator = GetComponent<Animator> ();

		// Set the next fire time to "now"
		_nextFireTime = Time.time;
	}

	void Update () {
		FireCannon ();
	}

	private void FireCannon()
	{
		// Detect, if the player presses the left mouse button
		if (Input.GetMouseButton(0))
		{
			// If the tank is not finished with reloading, skip the fire trigger
			if (Time.time <= _nextFireTime) {
				return;
			}

			// Set the next fire time
			_nextFireTime = Time.time + ReloadTime;

			// Play the animation
			_animator.SetTrigger("FireTrigger");
		}
	}
}
This script doesn’t do much yet and will later be used for shooting the actual bullet and other fancy stuff. So, what’s happening here? At first some variables are declared:
_animator: The animator used for controlling the animation. Since this script is attached to the same GameObject where the actual animator is attached, we just can grab it by using theGetComponent<Animator>();method in theAwake()method._nextFireTime: The absolute game time, when shooting the cannon is allowed.ReloadTime: The time the cannon needs to “reload”. It simply prevents full-automatic firing of the cannon.
The method FireCannon() now checks, if the player actually holds down the left mouse button (Input.GetMouseButton(0)). If yes, the script checks, if firing is allowed. It is allowed when the current game time (Time.time) is greater than _nextFireTime. If not, the method returns without doing anything.
In case of the tank is allowed to shoot, _nextFireTime will be calculated and the trigger FireTrigger from the _animator is called. It makes the animator play the CannonFireAnimation. If you start the game now, the tank should play the animation when clicking the left mouse button.